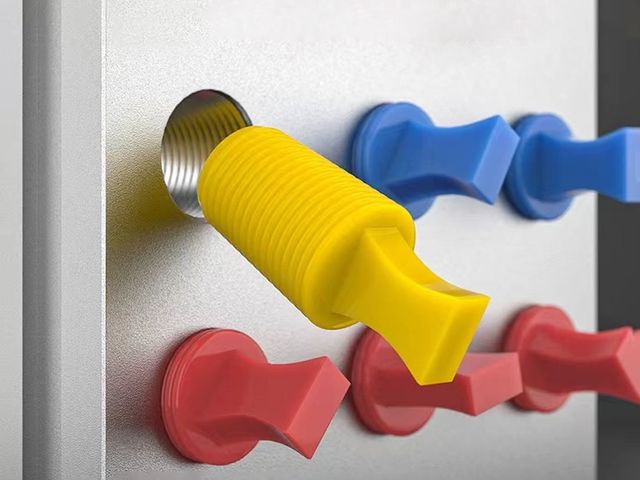
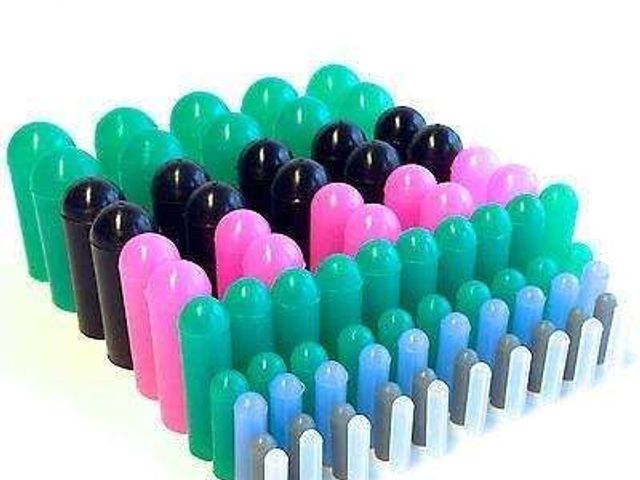
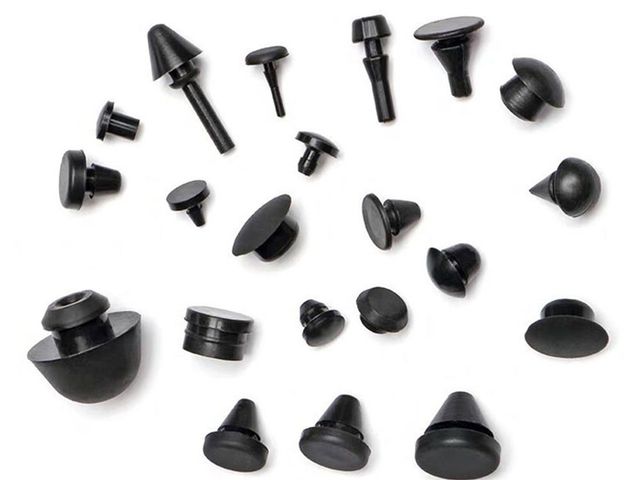
Powder coating masking mistakes are the most common cause of rework, rejects, and scrap on a finishing line — and nearly every one of them is preventable. Powder coating masking is the practice of protecting threaded holes, machined surfaces, electrical contacts, and other critical areas from powder overspray before the part enters the curing oven. Standard polyester powder coatings cure at 180–200°C (356–392°F), low-cure formulations at 150–160°C, and every plug, cap, or strip of tape on the part must survive that temperature for the entire bake. The ten most common powder coating masking mistakes are masking too late after pretreatment, choosing the wrong tape temperature tier, running tape beyond its rated limit, plug sizing errors that let silicone plugs fall out in the oven or tear the part, failing to vent sealed components, reusing heat-aged silicone, cheap adhesive residue, contamination from hands and racks, sharp-edge bleed under fine-line tape, and forgetting rack contact points. This guide explains what each mistake does to your finish, why it happens, and exactly how to fix it — with the temperature data you need to specify masking materials with confidence. If you are new to the process, start with our powder coating masking guide.
Mistake 1: Masking Too Late (After Pretreatment)
What happens: Coating blisters and delaminates around the edge of the mask, powder bridges onto areas that were supposed to stay bare, and bare-metal spots flash rust before they ever see the oven.
Why it happens: The pretreat line — typically zinc or iron phosphate at 40–55°C, plus acid etch and rinse stages — leaves a chemically active surface. If you mask after pretreatment, you handle the freshly prepared part. Skin oils, glove contamination, and shop salts transfer onto the activated surface, and the powder film over those areas develops fisheyes and adhesion failures. Worse, if your masking material cannot survive the wash line, you are forced to mask late, which is exactly the wrong time.
The fix: Mask before pretreatment whenever your masking material can tolerate the wet chemistry. Silicone plugs and caps and polyimide tape shrug off the wash line, so parts can be fully masked at incoming inspection and run straight through pretreat to the oven. If you must mask after pretreatment, do it immediately after the dry-off oven, wearing clean gloves, and inspect every masked area for handling marks before racking.
Mistake 2: Using the Wrong Temperature Tier of Tape
What happens: A strip of crepe or washi tape rated for 80–120°C melts, chars, or shrinks away at a 180–200°C powder cure. The tape embeds in the coating, leaves scorched adhesive, and the masked edge is ragged instead of crisp.
Why it happens: Masking materials are rated for a temperature tier, and standard powder cure sits at the top of the range. Many shops keep a drawer full of paper tapes from old liquid-paint jobs and assume "high temp" means any oven. It does not — a tape rated for 120–150°C is a 150°C tape, not a 200°C tape.
The fix: Match the masking material to the actual peak metal temperature of your cure schedule, not the oven setpoint and not the product name. For a 180–200°C polyester cure, use silicone plugs and caps or high-temperature polyimide tape. For low-cure lines at 150–160°C, PET tape and silicone still work; washi and crepe belong below that. When in doubt, assume your line runs hotter than the label suggests.
Mistake 3: Running Tape Beyond Its Rated Temperature
What happens: Tape that is technically "rated for 200°C" chars at the edges, turns brittle, delaminates mid-bake, and lets powder bleed underneath. Sometimes the failure shows up only as a faint stain that fails QC.
Why it happens: A temperature rating assumes a specific dwell time and a tape used right at its ceiling has zero margin. Real parts can exceed the oven setpoint — dark-colored parts absorb radiant heat, thick cross-sections hold heat longer, and racks near oven walls run hotter than the middle. Fifteen extra minutes at the edge of the rating is enough to cook the adhesive.
The fix: Buy 20–30°C of headroom. If your cure is 180–200°C, do not rely on a tape rated at 200°C; use a material rated at 220–260°C continuous. Measure the actual metal temperature of your worst-case part with a thermal probe through a full cycle, then specify from that number. Our high-temperature masking tapes guide walks through matching adhesive systems to cure schedules.
Mistake 4: Plug Sizing Errors (Undersized and Oversized Plugs)
What happens: This is the classic "silicone plugs falling out oven" failure. An undersized plug drops out mid-bake and powder floods the thread — or it stays seated but leaks, coating the first two threads. An oversized plug, by contrast, tears on removal, leaves silicone smears in the threads, and compresses the hole so the fastener fights its way back in.
Why it happens: Silicone's coefficient of thermal expansion is several times higher than steel or aluminum. A plug that fits snugly at room temperature can lose its interference fit at 200°C as the metal bore grows and the silicone softens, so gravity and oven airflow win. Oversized plugs have the opposite problem: they go in with a hammer and come out with a fight, shearing the delicate seal lips and scuffing the bore.
The fix: Size plugs against a measured hole, not a guesstimate. For a standard interference fit, the plug's largest OD should be roughly 0.2–0.5 mm larger than the smallest ID of the bore at room temperature — but verify it in a test bake, because thermal behavior varies with wall thickness and material. Use flanged plugs where a positive stop is needed, and step up to our high-temperature silicone masking plugs for tapered and threaded-hole profiles. If plugs keep dropping out at 180–200°C, suspect the fit first and the oven airflow second.
Mistake 5: Venting Failures on Sealed Components
What happens: Bubbles and blisters blow out of the powder film over sealed weldments, blind cavities, and box sections. In the worst cases, the expanding gas pops the plug out of a sealed fitting entirely, and you get both a bubble and an uncoated hole.
Why it happens: A sealed cavity at 200°C contains air that expands by roughly 60% over room temperature, and welded seams outgas volatiles on first bake. The powder film cures to a nearly impermeable skin, so the trapped gas has nowhere to go — it balloons the coating, then bursts.
The fix: Give the gas a controlled exit. Use high-temp silicone vent plugs with a built-in breathing channel on sealed ports, drill a small vent hole in blind weldments before coating, or leave one plug seat unsealed so pressure can equalize. Degassing the part — a short pre-bake or letting welded fabrications cool completely after welding — removes volatiles before the powder cures. Treat venting as part of masking, not an afterthought.
Mistake 6: Reusing Heat-Aged Silicone Past Its Service Life
What happens: Plugs and caps that worked perfectly for twenty bakes suddenly go hard and chalky. They no longer seal, they fall out in the oven, and cracked silicone sheds particles that land on the finish and cause contamination rejects.
Why it happens: Silicone heat-ages. Silicone rubber is rated for 260°C continuous operation and 315°C short-term, but every thermal cycle to 180–200°C slowly consumes the elastomer's life. The surface oxidizes, plasticizers bleed out, and what was a soft 40–50 Shore A plug becomes a hard, brittle shell. The failure is invisible on the outside until it cracks.
The fix: Treat reusable silicone as a consumable with a measured life. Inspect plugs and caps before every racking pass: crack the surface with your fingernail, flex the lip, and look for whitening, crazing, or loss of rebound. Rotate stock so the same plugs are not baked daily, track cycles per batch, and replace heat-aged tooling on a schedule rather than when it fails. For a deeper look at what silicone can and cannot take, see our silicone material page.
Mistake 7: Adhesive Residue from Cheap Tapes
What happens: After the bake, the tape is gone but a sticky, discolored band remains. It reads as contamination under QC lighting, requires solvent wiping on every part, and in the worst cases bonds to the coating and cannot be removed without damaging the finish.
Why it happens: Low-grade rubber-based or poorly cross-linked acrylic adhesives are never designed for a 180–200°C bake. The adhesive softens, migrates, oxidizes, and partially transfers to the part as the tape is stripped. The transfer is worse when the tape is removed hot, straight out of the oven.
The fix: Specify tapes with adhesives rated for your actual bake — silicone adhesives for the hottest cures, and cross-linked acrylic systems engineered for clean release after heating. Strip tapes cool or at the temperature recommended by the manufacturer, and never buy on price alone; a rejected batch of parts costs far more than the savings on tape. The high-temperature masking tapes guide covers which adhesive systems clean-release at powder-cure temperatures.
Mistake 8: Masking Contamination (Hands, Gloves, and Racks)
What happens: Fisheyes, cratering, and bare spots appear in the powder film in no obvious pattern — usually near masked areas. The powder pulls away from the contamination during gel, leaving a characteristic ring defect that cannot be sanded out of a thin film.
Why it happens: Masking is a handling operation, and handling is where contamination happens. Bare hands transfer skin oils; standard latex or nitrile gloves can carry silicone-based mold-release compounds; dirty racks hold onto old powder, grease, and blast media that shake loose onto freshly masked parts. The contaminant interferes with surface wetting, so the molten powder never bonds.
The fix: Isolate the part from the handler. Use clean, powder-free gloves rated for the shop, handle parts by masked surfaces or dedicated handling points, and strip racks and hooks on a fixed schedule so they cannot shed onto the line. Wipe critical areas with a lint-free cloth and compatible solvent immediately before masking, and keep masking supplies in closed bins — an open box of plugs on a dusty shelf is a contamination source.
Mistake 9: Sharp-Edge Bleed Under Fine-Line Tape
What happens: On two-tone and color-break work, powder creeps under the tape at sharp edges and corners, producing a feathered, ragged line instead of a crisp edge. The defect shows up on the most visible part of the product.
Why it happens: Powder coating is an electrostatic, gravity-fed process: charged particles actively seek the bare metal edge, and the film builds at edges faster than in flats. A tape that does not conform tightly to the contour leaves a microscopic gap, and the edge charge pulls powder straight underneath. Low-conformability tapes bridge the corner instead of folding into it.
The fix: Use a conformable, pressure-sensitive fine-line tape and burnish the edge after application — a squeegee or your thumbnail along the line is enough to seat it into the corner. For sharp external edges, apply a second pass of tape or use a slightly wider strip so the physical edge is covered, not just approached. When the line absolutely has to be perfect, mask, coat, cure, then remask for the second color. Our washi fine-line masking tapes are built for exactly this geometry.
What happens: Every part comes off the rack with a bare, uncoated spot where the hook touched — and where the coating is thin at the contact, rust blooms within weeks. Racks also accumulate baked-on powder that spalls onto later parts, creating the speckle defects that keep getting blamed on the powder itself.
Why it happens: A rack hook physically shields the metal it touches, so that area never receives powder. If the hook is not designed, stripped, or masked, the contact point is random, the bare area is large, and the same spot on every part becomes a corrosion start point. Built-up powder on the rack acts as a reservoir of contamination.
The fix: Engineer the racking before the parts reach the line. Position contact points in low-visibility or non-critical areas, use fine wire or knife-edge hooks to minimize the shielded footprint, and strip racks on a schedule — a burn-off oven for the rack is cheaper than a reject lot. Mask reusable rack hooks with silicone caps so the contact area is controlled, and apply good racking and handling practice to the whole sequence.
Temperature Data Anchor: Matching Masking Material to Your Bake
Use this table as your specification baseline. The rule is simple: the masking material's continuous rating must clear your cure temperature with margin.
The most reliable "how to mask powder coating" answer is to read the part's worst-case metal temperature, add 20–30°C of margin, and select from the tier above. When two materials qualify, choose the one whose service life fits your part volume and reuse plan — silicone for reusable plugs and caps, polyimide or PET for disposable tape.
FAQ
What temperature does powder coating masking tape need to withstand?
Match the tape rating to your actual peak metal temperature. Standard polyester powder cures at 180–200°C, which rules out crepe (80–120°C) and washi (120–150°C) for most parts. At standard cure you need silicone or polyimide; at low-cure (150–160°C), PET tape and silicone both qualify. Always leave 20–30°C of headroom above your measured part temperature.
Why do silicone plugs fall out in the oven?
Almost always sizing. If the plug's largest OD is only marginally larger than the bore ID at room temperature, the difference can disappear at 180–200°C because silicone expands and softens far more than steel or aluminum does — the interference fit vanishes and the plug drops out. Sealed cavities that outgas can also blow plugs loose. Fix it by sizing the plug to the measured bore, testing in a bake cycle, and venting sealed components.
Can I reuse silicone masking plugs and caps?
Yes, but treat them as a consumable. Silicone rated for 260°C continuous survives many 180–200°C bake cycles, yet every cycle consumes its life. Inspect before each use for whitening, cracking, and loss of rebound, rotate your stock, and replace heat-aged tooling on a schedule.
How do I stop powder bleed under masking tape?
Burnish the tape edge into the corner after application, use a conformable washi fine-line tape on sharp contours, and confirm the tape is rated for the cure so it does not shrink away from the edge mid-bake. For two-tone work, coat and cure the first color before masking for the second.
When is the right time to apply powder coating masking?
Ideally before pretreatment, so the masking material sees the wash line along with the part — silicone plugs, caps, and polyimide tape tolerate the chemistry. If you mask after pretreat, do it immediately after dry-off with clean gloves, before any handling contaminates the activated surface.
Get Free Masking Samples Before Your Next Bake
Every mistake on this list is a specification problem, and you can fix it before the parts are ever racked. Send us your hole sizes, thread pitches, cure temperature, and part photos — our engineers will match the right temperature tier of plugs, caps, and tapes, and ship you a free sample kit to test in your own oven. Request a quote or free samples today at leadermasking-global.com, and stop turning preventable masking mistakes into rework and rejects.